你好,我是黄佳。
到目前为止,我们已经演练了很多 MCP 和 A2A 的实战示例。在这节课中,我将带你通过实际操作,使用开源的 python-a2a 库构建一个具备 A2A 通信与 MCP 工具调用能力的智能 Agent 系统。我们会从零开始,创建工具服务、实现代理通信,并集成大模型,使Agent具备真实的感知与行动能力。
这节课将构建一个完整的 A2A + MCP 智能 Agent 系统
3 分钟复习一下 A2A 与 MCP 协议
在未来的多智能体系统中,A2A 和 MCP 将成为两个关键基础协议。
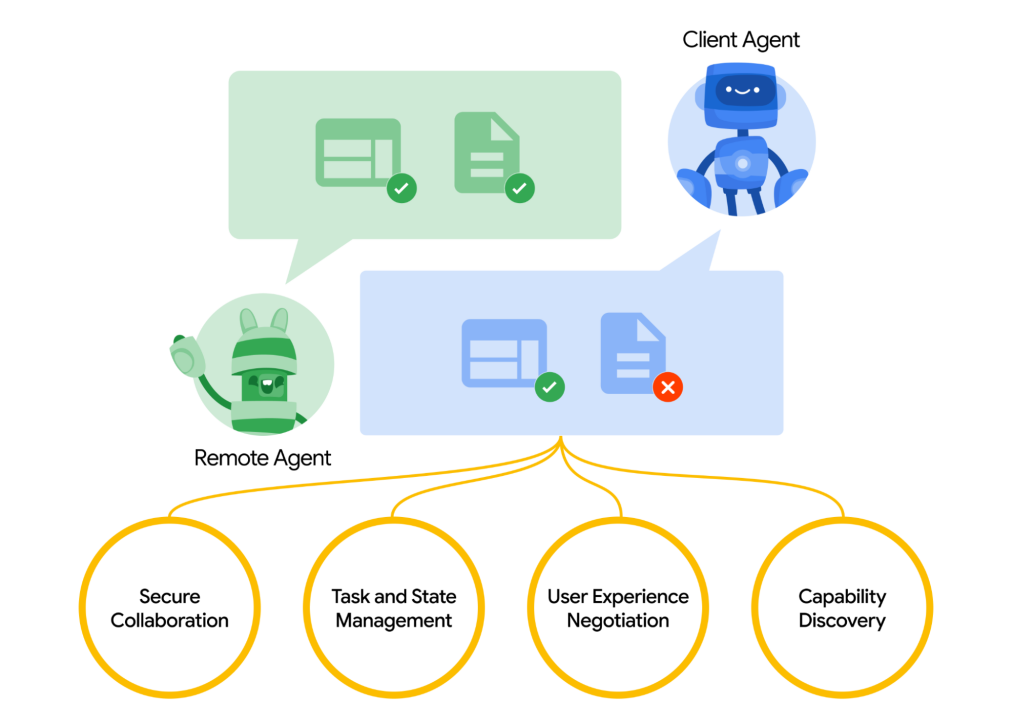
A2A 是 Google 于 2025 年 4 月发布的开放协议,专为AI代理之间的协作与互操作设计,特别适用于大规模、多智能体系统。其目标是建立统一通信格式,使不同 AI 代理能够互相发现、理解能力,并实现任务协作、状态共享。
A2A的关键能力包括:
-
安全协作:企业级认证和权限控制。
-
状态管理:支持任务跟踪、实时通知。
-
能力发现与协商:自动对接功能,提升交互质量。
-
多模态通信:支持文本、音频、视频等信息交换。
MCP 由 Anthropic 于 2024 年 11 月推出,致力于标准化 AI 模型对外部工具与数据的调用,推动从“会聊天”向“能执行”进化。目标是统一函数调用接口,连接 API、数据库、文件系统等上下文资源,降低 AI 模型与外部系统的集成成本。
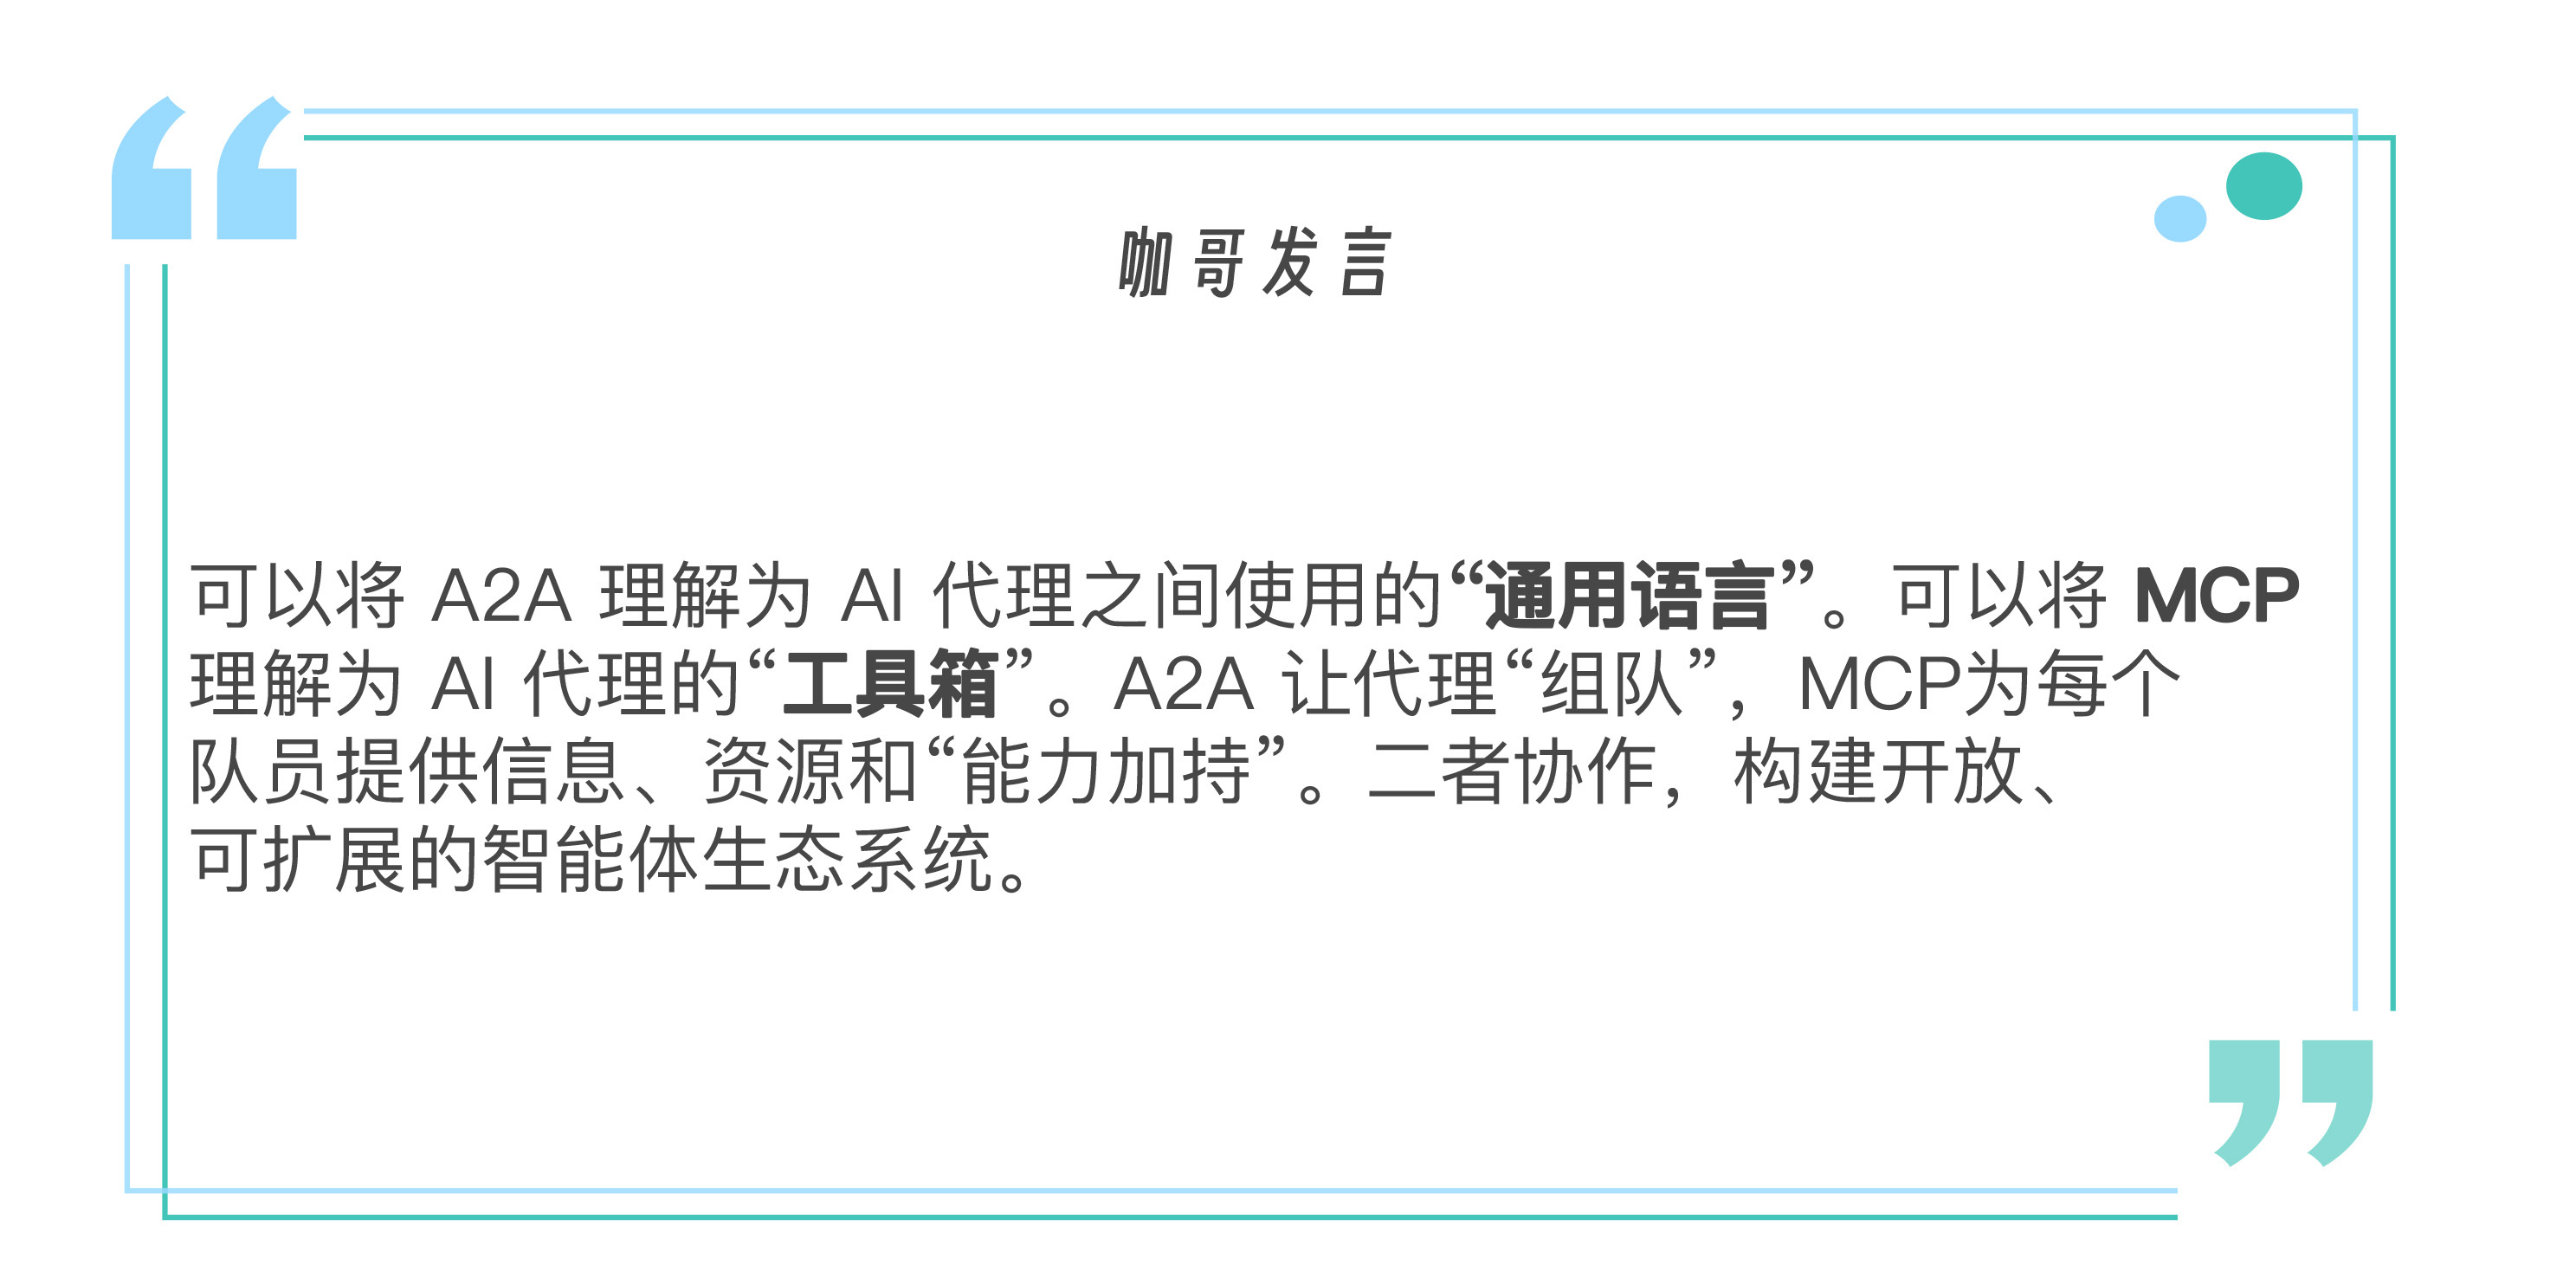
A2A 和 MCP 聚焦点不同,却高度互补:
-
A2A 关注代理间如何沟通、协作、分工,定义“谁和谁说话,为了什么目标”。
-
MCP 关注代理如何调用外部工具,定义“有什么工具、怎么用、返回什么结果”
二者结合,就构成了智能体系统的通信中枢 + 行动引擎。
以旅行规划为例,当用户向“旅行总代理”提出请求(A2A 发起),总代理将任务拆分为子任务并通过 A2A 分配给多个代理:
-
机票代理 → 通过 MCP 调用航班比价工具
-
酒店代理 → 通过 MCP 查询酒店数据库
-
景点代理 → 调用天气工具和用户偏好服务
子代理完成任务后通过 A2A 汇总结果,总代理整合后返回给用户。
第一部分:构建 MCP 工具服务
我们的第一个任务是创建一个 MCP 服务,它将提供一些基础的工具供后续的 A2A 代理调用。
首先,进入代码示例库的A2A-MCP目录,并在你的终端中运行 uv pip install. 来自动安装环境,也可以通过requirements.txt来手动创建环境。此处的关键包是python-a2a 库。这是一个开源的A2A和MCP协议的社区实现,适合于协议的学习。
此外,在部署MCP工具时涉及第三方API Key的创建,需要在这个链接中申请天气API。
接下来我们创建一个简化版的工具脚本,创建 MCP 工具代码,命名为 mcp_server.py。
# mcp_server.py
from   python_a2a.mcp import FastMCP, text_response, create_fastapi_app
import   uvicorn
from   datetime import datetime
import   time # 用于 get_current_time
import   requests

# 1. 创建 FastMCP 服务实例
# FastMCP   是一个轻量级的 MCP 服务器实现
utility_mcp   = FastMCP(
   name="My Utility Tools",
   description="一些常用的实用MCP工具集合",
   version="1.0.0"
)

# 2. 定义第一个工具:计算器
@utility_mcp.tool(
   name="calculator", # 工具的唯一名称
   description="执行一个简单的数学表达式字符串,例如   '5 * 3 + 2'"
   # 工具的描述,LLM   可以理解这个描述来决定何时使用它
)
def   calculate(expression: str): # 类型提示很重要,MCP 会据此生成工具的 schema
   """
   安全地评估一个数学表达式字符串。
   Args:
       expression: 要评估的数学表达式,例如   "10 + 5*2"
   Returns:
       包含计算结果的文本响应。
   """
   try:
       result = eval(expression,   {"__builtins__": {}}, {"abs": abs, "max": max,   "min": min, "pow": pow, "round": round,   "sum": sum})
       return text_response(f"计算结果: {expression} = {result}")
   except Exception as e:
       return text_response(f"计算错误 '{expression}': {str(e)}")

# 3. 定义第二个工具:获取当前时间
@utility_mcp.tool(
   name="get_current_time",
   description="获取当前本地的日期和时间信息"
)
def   get_current_time_tool(): # 注意:工具函数名可以和工具名不同
   """
   获取当前的日期和时间。
   Returns:
       包含当前日期和时间的文本响应。
   """
   now = datetime.now()
     response = (
         f"当前日期:   {now.strftime('%Y-%m-%d')}\\n"
         f"当前时间:   {now.strftime('%H:%M:%S')}\\n"
         f"星期几:   {now.strftime('%A')}"
     )
     return text_response(response)

 OPENWEATHER_API_KEY="ee0c0d496e95d9237069b703fb4b8fa4"

 @utility_mcp.tool(
     name="get_current_weather",
     description="获取当前的天气信息,需要提供城市名称"
 )
 def   get_current_weather_tool(city: str):
     try:
         # 请求 OpenWeatherMap   API
         url =   f"http://api.openweathermap.org/data/2.5/weather"
         params = {
             "q": city,
             "appid":   OPENWEATHER_API_KEY,
             "units":   "metric",
             "lang":   "zh_cn"
         }
         response = requests.get(url,   params=params)
         data = response.json()

         if response.status_code != 200:
             return text_response(f"获取{city}天气失败:{data.get('message', '未知错误')}")

         weather_desc =   data['weather'][0]['description']
         temp = data['main']['temp']
         feels_like =   data['main']['feels_like']
         return text_response(f"{city}当前天气是 {weather_desc},温度为 {temp}°C,体感温度为 {feels_like}°C")

     except Exception as e:
         return text_response(f"获取{city}天气时出错:{str(e)}")

 # 运行 MCP 服务
 if   __name__ == "__main__":
     port = 7001 # 指定服务端口
     print(f"🚀 My Utility MCP 服务即将启动于 http://localhost:{port}")

     # create_fastapi_app 会将   FastMCP 实例转换为一个 FastAPI 应用
     app = create_fastapi_app(utility_mcp)

     # 使用 uvicorn 运行 FastAPI 应用
     # 这部分代码会阻塞,直到服务停止   (例如按 Ctrl+C)
     uvicorn.run(app,   host="0.0.0.0", port=port)
这里我们通过 FastMCP(…) 初始化了一个 MCP 服务,name、description、version 是服务的元数据。@utility_mcp.tool(…) 是定义 MCP 工具的关键装饰器。其中,name是工具的唯一标识符,代理将通过这个名称调用工具;description是对工具功能的自然语言描述。这个描述非常重要,因为 AI 代理(尤其是 LLM 驱动的代理)会根据这个描述来理解工具的用途,并决定在何时调用它。
测试MCP工具服务
通过 uv run mcp_server.py 或者 python mcp_server.py 启动刚刚创建的 MCP 工具服务,能看到类似后面的输出:
🚀 自定义   MCP 服务即将启动于 http://localhost:7001
INFO:     Started server process   [10040]
INFO:     Waiting for application   startup.
INFO:     Application startup complete.
INFO:     Uvicorn running on http://0.0.0.0:7001
这意味着我们的 MCP 工具服务已经在 http://localhost:7001 上成功部署。
你可以打开浏览器访问 http://localhost:7001/tools 来查看已注册工具的列表(JSON格式),或者访问 http://localhost:7001/openapi.json (或 /docs /redoc) 查看 OpenAPI 文档。

请保持这个终端窗口的运行,因为我们的 A2A 代理稍后需要连接到这个服务。
第二部分:构建简单的 A2A 代理
现在我们有了一个正在运行的 MCP 工具服务,接下来我们将创建一个 A2A 代理,让它能够使用这些定义的工具。(参考文件 a2a_agent_simple.py)
# a2a_agent_simple.py
from python_a2a import A2AServer, run_server, TaskStatus, TaskState, AgentCard, AgentSkill
import requests # 用于直接调用 MCP 工具
import re
# A2A 代理的配置
AGENT_PORT = 7000 # A2A 代理监听的端口
MCP_SERVER_URL = "http://localhost:7001" # 我们之前启动的 MCP 工具服务的地址
class MyToolAgent(A2AServer):
def __init__(self, agent_card, mcp_url):
super().__init__(agent_card=agent_card)
self.mcp_url = mcp_url
print(f"🛠️ MyToolAgent 初始化完成,将连接到 MCP 服务: {self.mcp_url}")
def _call_mcp_tool(self, tool_name, params):
"""一个辅助方法,用于调用 MCP 工具"""
if not self.mcp_url:
return "错误:MCP 服务地址未配置。"
tool_endpoint = f"{self.mcp_url}/tools/{tool_name}"
try:
print(f"📞 正在调用 MCP 工具: {tool_endpoint},参数: {params}")
response = requests.post(tool_endpoint, json=params, timeout=10)
response.raise_for_status() # 如果 HTTP 状态码是 4xx 或 5xx,则抛出异常
tool_response_json = response.json()
print(f"工具响应JSON: {tool_response_json}")
# 从 MCP 响应中提取文本内容
# MCP 响应通常在 content -> parts -> text
if tool_response_json.get("content"):
parts = tool_response_json["content"]
if isinstance(parts, list) and len(parts) > 0 and "text" in parts[0]:
return parts[0]["text"]
return "工具成功执行,但未找到标准文本输出。"
except requests.exceptions.RequestException as e:
error_msg = f"调用 MCP 工具 {tool_name} 失败: {e}"
print(f"❌ {error_msg}")
return error_msg
except Exception as e_json: # requests.post 成功,但响应不是期望的json或json结构不对
error_msg = f"解析 MCP 工具 {tool_name} 响应失败: {e_json}"
print(f"❌ {error_msg}")
return error_msg
def handle_task(self, task):
"""处理接收到的任务 (A2A 消息)"""
message_data = task.message or {}
content = message_data.get("content", {})
text = content.get("text", "").lower() # 用户输入的文本,转为小写方便匹配
print(f"📨 收到任务: {text}")
response_text = "抱歉,我不太明白您的意思。您可以尝试问我:\\n" \
"- '计算 123 + 456'\\n" \
"- '现在几点了?'"
# 1. 尝试匹配计算任务
expression = None
# 模式1: 表达式在 "等于多少" 前面, e.g., "5+3等于多少"
match_equals = re.search(r"(.+?)\s*等于多少", text)
if match_equals:
expression = match_equals.group(1).strip()
else:
# 模式2: 表达式在 "计算" 或 "算一下" 后面, e.g., "计算 5+3"
# 使用非捕获组 (?:...) 来匹配关键字,并捕获后面的表达式。
# re.search 会在字符串中寻找匹配,所以 "帮我计算 5+3" 也能正常工作。
match_action = re.search(r"(?:算一下|计算)\s+(.+)", text)
if match_action:
expression = match_action.group(1).strip()
if expression:
# 进一步清理表达式,以处理 "计算 5+3 等于多少" 这样的混合情况
expression = expression.split("等于多少")[0].strip()
if expression: # 确保清理后还有表达式
print(f"识别到计算任务,表达式: '{expression}'")
response_text = self._call_mcp_tool("calculator", {"expression": expression})
else:
response_text = "请输入要计算的数学表达式,例如:'计算 8*(9+4)'"
# 2. 尝试匹配时间查询任务
# 使用更广泛的关键字匹配时间/日期查询
time_keywords = ["几点", "几点了", "时间", "日期"]
if any(keyword in text for keyword in time_keywords):
print("识别到时间查询任务")
response_text = self._call_mcp_tool("get_current_time", {})
# 3. 匹配天气查询
weather_keywords = ["天气", "气温"]
# 正则匹配识别城市,例如 "Shenzhen天气" 中的 "Shenzhen"
city_match = re.search(r"([\u4e00-\u9fa5a-zA-Z]+)的?天气", text)
city = city_match.group(1) if city_match else None
if any(keyword in text for keyword in weather_keywords):
print("识别到天气查询任务")
response_text = self._call_mcp_tool("get_current_weather", {"city": city})
# 构建 A2A 响应
task.artifacts = [{"parts": [{"type": "text", "text": str(response_text)}]}] # 确保是字符串
task.status = TaskStatus(state=TaskState.COMPLETED)
print(f"📤 回复任务: {response_text}")
return task
if __name__ == "__main__":
# 定义代理的 "名片"
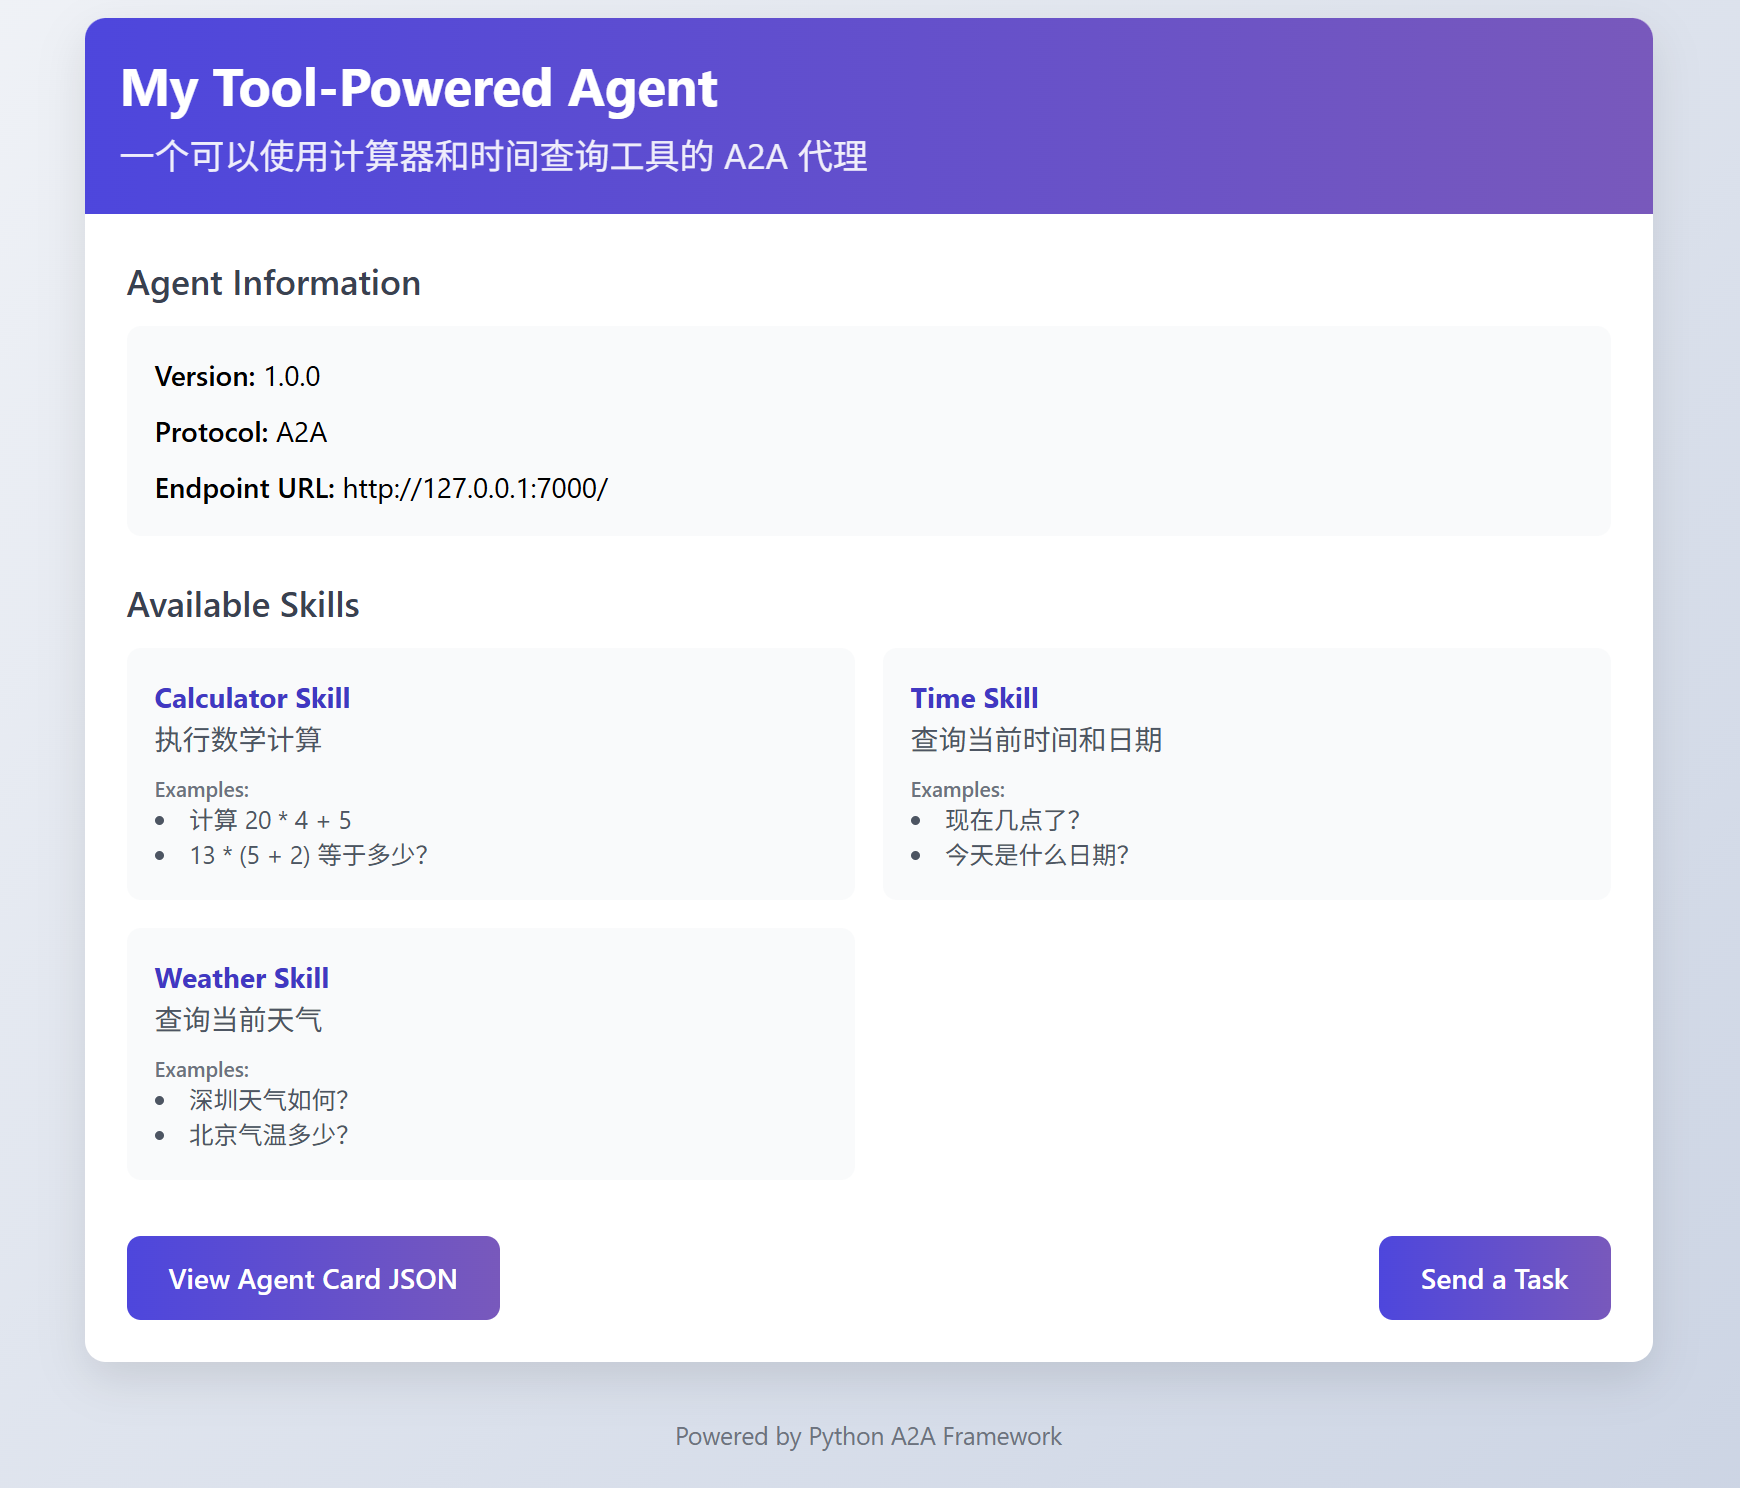
agent_card = AgentCard(
name="My Tool-Powered Agent",
description="一个可以使用计算器和时间查询工具的 A2A 代理",
url=f"http://localhost:{AGENT_PORT}", # 代理自己的访问地址
version="1.0.0",
skills=[ # 列出代理具备的技能
AgentSkill(
name="Calculator Skill",
description="执行数学计算",
examples=["计算 20 * 4 + 5", " 13 * (5 + 2) 等于多少?"]
),
AgentSkill(
name="Time Skill",
description="查询当前时间和日期",
examples=["现在几点了?", "今天是什么日期?"]
),
AgentSkill(
name="Weather Skill",
description="查询当前天气",
examples=["深圳天气如何?", "北京气温多少?"]
)
]
)
my_agent = MyToolAgent(agent_card, MCP_SERVER_URL)
print(f"🚀 My A2A Agent 即将启动于 http://localhost:{AGENT_PORT}")
print(f"🔗 它将连接到 MCP 服务于 {MCP_SERVER_URL}")
# run_server 会启动一个 Flask (默认) 或 FastAPI 服务器来托管 A2A 代理
# 这部分代码也会阻塞
run_server(my_agent, host="0.0.0.0", port=AGENT_PORT)
此处 MyToolAgent(A2AServer) 这个代理类继承自 python_a2a.A2AServer。构造函数init()接收一个 agent_card(代理的元数据)和 mcp_url (MCP 服务的地址)。
_call_mcp_tool(…) 是一个自定义的辅助方法,封装了通过 HTTP POST 请求调用 MCP 工具的逻辑。它构造了工具的完整 URL (例如 http://localhost:7001/tools/calculator),使用 requests.post() 发送 JSON 数据,解析 MCP 服务返回的 JSON 响应,并提取其中的文本内容。
handle_task(self, task) 是 A2A 代理的核心方法,每当代理收到一个任务(通常是一个用户消息),这个方法就会被调用,通过task.message.content.text 获取用户发送的文本消息,然后判断用户的意图。在a2a_agent_simple.py这个例子中,我们通过简单的关键字匹配和正则表达式来判断用户的意图。
-
如果检测到用户意图是计算,就调用 MCP 技能库中的 calculator 工具。
-
如果检测到用户意图是查询时间,就调用 MCP 技能库的 get_current_time 工具。
在handle_task方法的最后,通过task.artifacts = […] 设置任务的产出物,这里是将工具的响应或默认回复包装成 A2A 协议要求的格式。task.status = TaskStatus(state=TaskState.COMPLETED) 则将任务状态标记为已完成。
在主程序中,AgentCard 和 AgentSkill用于定义代理的元数据,如名称、描述、它提供的技能等。这对于代理发现和服务描述很重要。
测试A2A Agent(Simple)
下面我们来运行并测试这个简单A2A代理。
首先确保 mcp_server.py (MCP 工具服务) 仍在7001端口运行,然后打开一个新的终端窗口,导航到 a2a_agent_simple.py 文件所在的目录,然后运行uv run a2a_agent_simple.py 或python a2a_agent_simple.py。
🛠️ MyToolAgent 初始化完成,将连接到 MCP 服务:   http://localhost:7001
🚀 My A2A Agent 即将启动于 http://localhost:7000
🔗 它将连接到 MCP 服务于   http://localhost:7001
Starting A2A server on http://0.0.0.0:7000/a2a
Google A2A compatibility: Enabled
* Serving Flask app   'python_a2a.server.http'
* Debug mode: off
INFO:werkzeug:WARNING: This is a development server. Do not use it   in a production deployment. Use a production WSGI server instead.
* Running on all addresses (0.0.0.0)
* Running on http://127.0.0.1:7000
* Running on http://【本机在局域网的ip地址】:7000
输出显示,我们的 A2A 代理已经在 http://localhost:7000 上成功运行了。我们打开 http://localhost:7000,可以看到A2A给我们提供了一个dashboard,Agent Information 是我们定义的Agent Card,Available Skills 这里是可用工具。
下面创建一个jupyter notebook,使用 python_a2a 库提供的 A2AClient 功能来测试A2A Agent。
首先确保我们的虚拟环境支持Jupyter Notebook运行。
在 mcp+a2a 目录下,先激活 .venv:
source .venv/bin/activate
在 .venv 环境下,安装 ipykernel 到当前虚拟环境:
install ipykernel
注册当前虚拟环境为 Jupyter 内核。
python -m ipykernel install --user --name a2a-venv --display-name "Python 3 (a2a-mcp)"
其中:
-
–name 是内核的唯一标识(随便取,建议用项目名相关)。
-
–display-name 是你在 Jupyter Notebook 里看到的名字。
选择当前虚拟环境来运行notebook,在新建的notebook中定义测试端口:
 from python_a2a.client import   A2AClient

 agent_url = "http://localhost:7000"
 # 创建客户端,指向你运行的代理服务地址
 client = A2AClient(agent_url)
并测试计算器功能:
 response = client.ask("3*100+20等于多少")

 print(response)
输出如下:
此时可以在部署 MCP 工具的终端看到调用了 calculator 工具的提示。
INFO: 127.0.0.1:XXXX - "POST /tools/calculator HTTP/1.1" 200 OK
而在部署 A2A 服务的终端,可以看到中间的过程提示。
📨 收到任务:   从1加到100等于多少
   识别到计算任务,表达式: '从1加到100'
   📞 正在调用 MCP 工具:   http://localhost:7001/tools/calculator,参数:   {'expression': '从1加到100'}
   工具响应JSON: {'content': [{'type': 'text', 'text':   "计算错误 '从1加到100': name '从1加到100'   is not defined"}], 'isError': False}
   📤 回复任务: 计算错误 '从1加到100': name '从1加到100' is not defined
   INFO:werkzeug:127.0.0.1 - - [28/Jun/2025 14:37:10] "POST /tasks/send   HTTP/1.1" 200 -
   📨 收到任务: 3*100+20等于多少
   识别到计算任务,表达式: '3*100+20'
   📞 正在调用 MCP 工具:   http://localhost:7001/tools/calculator,参数:   {'expression': '3*100+20'}
   工具响应JSON: {'content': [{'type': 'text', 'text': '计算结果: 3*100+20 = 320'}], 'isError': False}
   📤 回复任务: 计算结果:   3*100+20 = 320
   INFO:werkzeug:127.0.0.1 - - [28/Jun/2025 14:37:16] "POST /tasks/send   HTTP/1.1" 200 -
我们继续测试查询时间的功能。
 response = client.ask("现在是什么时间?")
 print(response)
输出如下。
如果一切顺利的话,我们就能在部署 MCP 工具的终端看到调用了定义的 get_current_time 工具并返回当前系统时间。
INFO: 127.0.0.1:XXXX - "POST /tools/get_current_time HTTP/1.1" 200 OK
而在部署 A2A 服务的终端,可以看到中间的过程提示。
   📨 收到任务:   现在是什么时间?
   识别到时间查询任务
   📞 正在调用 MCP 工具:   http://localhost:7001/tools/get_current_time,参数: {}
   工具响应JSON: {'content': [{'type': 'text', 'text': '当前日期: 2025-06-28\\n当前时间:   15:44:36\\n星期几: Saturday'}], 'isError': False}
   📤 回复任务: 当前日期:   2025-06-28\n当前时间: 15:44:36\n星期几:   Saturday
   INFO:werkzeug:127.0.0.1 - - [28/Jun/2025 15:44:36] "POST /tasks/send   HTTP/1.1" 200 -
继续测试查询天气的功能。这里需要传入城市英文名称。
 response =   client.ask("Shenzhen天气")
 print(response)
输出如下。
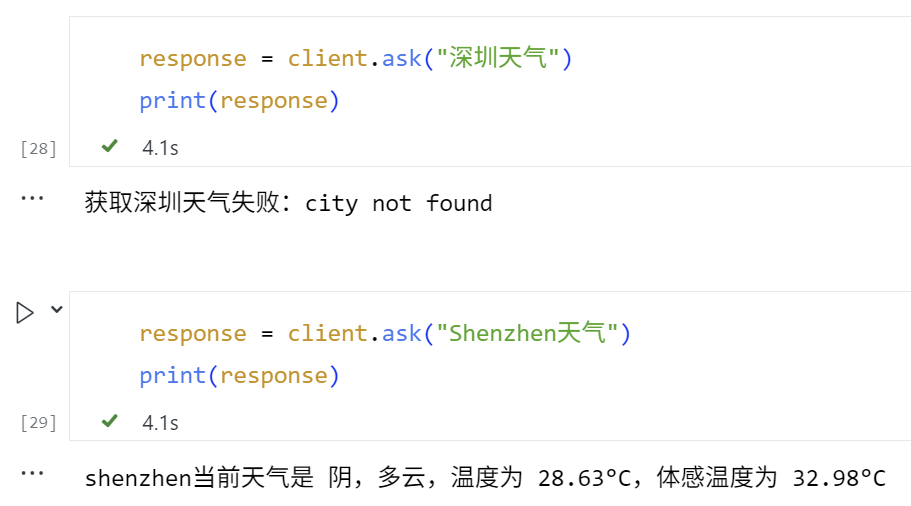
在部署 MCP 工具的终端,我们也会看到调用了定义的get_current_weather工具并返回要查询的城市的天气。
INFO:     127.0.0.1:XXXXX - "POST   /tools/get_current_weather HTTP/1.1" 200
OK
而在部署 A2A 服务的终端,可以看到中间的过程提示。
📨 收到任务:   深圳天气
   识别到天气查询任务
   📞 正在调用 MCP 工具:   http://localhost:7001/tools/get_current_weather,参数:   {'city': '深圳'}
   工具响应JSON: {'content': [{'type': 'text', 'text': '获取深圳天气失败:city not found'}], 'isError': False}
   📤 回复任务: 获取深圳天气失败:city   not found
   INFO:werkzeug:127.0.0.1 - - [28/Jun/2025 17:35:26] "POST /tasks/send   HTTP/1.1" 200 -
   📨 收到任务: shenzhen天气
   识别到天气查询任务
   📞 正在调用 MCP 工具:   http://localhost:7001/tools/get_current_weather,参数:   {'city': 'shenzhen'}
   工具响应JSON: {'content': [{'type': 'text', 'text':   'shenzhen当前天气是 阴,多云,温度为 28.63°C,体 感温度为   32.98°C'}], 'isError': False}
   📤 回复任务: shenzhen当前天气是 阴,多云,温度为   28.63°C,体感温度为 32.98°C
   INFO:werkzeug:127.0.0.1 - - [28/Jun/2025 17:35:32] "POST /tasks/send   HTTP/1.1" 200 -
至此,通过A2A 与 MCP 的协同工作机制,建成了可调用外部 MCP 工具的 A2A 代理。
第三部分:让 A2A 代理更加智能
尽管上述的简单A2A代理已经实现了A2A+MCP架构的雏形,但是它依赖于简单的关键字匹配来决定调用哪个工具,并且直接返回工具的结果。但很多情况下,这个程度的智能并不理想,例如:
-
用户倾向于使用自然语言表达需求,仅依赖关键词匹配可能无法准确理解其意图(例如计算“从1加到100”)。
-
当前的参数匹配基于正则表达式,但实际应用中需要更精确的参数提取方法(例如无法提取中文城市名直接用作获取天气的参数)。
-
用户的需求可能涉及多个工具协同工作,或要求对返回结果进行额外处理和语义解释。
这时,就轮到大语言模型出场了!你可以将 LLM集成到我们的 A2A 代理中,让它充当“翻译官”,来理解用户意图、选择合适的工具(如果需要)、调用工具、传入合适参数(如有),并以更自然、更智能的方式回复用户。—— 此时,LLM就相当于是一个A2A架构中的“调度Agent”。
现在,我们来创建一个新的程序 a2a_agent_advanced.py,它将结合LLM和我们之前创建的 MCP 工具。
# a2a_agent_advanced.py
from python_a2a import A2AServer, run_server, TaskStatus, TaskState, AgentCard, AgentSkill
import requests
import re
import os
import json
import time
from openai import OpenAI
from dotenv import load_dotenv
# 加载 .env 文件中的环境变量
load_dotenv()
# --- 配置 ---
AGENT_PORT = 7002
MCP_SERVER_URL = "http://localhost:7001" # 我们的 MCP 工具服务
OPENAI_API_KEY = os.getenv("OPENAI_API_KEY")
OPENAI_BASE_URL = "https://api.openai.com/v1"
OPENAI_MODEL = "gpt-4o" # 或者其他模型
# 初始化 OpenAI 客户端
openai_client = OpenAI(
api_key=OPENAI_API_KEY,
base_url=OPENAI_BASE_URL,
)
class OpenAIEnhancedAgent(A2AServer):
def __init__(self, agent_card, mcp_url):
super().__init__(agent_card=agent_card)
self.mcp_url = mcp_url
print(f"🤖 OpenAIEnhancedAgent 初始化,MCP 服务: {self.mcp_url}")
def _call_mcp_tool(self, tool_name, params):
"""一个辅助方法,用于调用 MCP 工具"""
if not self.mcp_url:
return "错误:MCP 服务地址未配置。"
tool_endpoint = f"{self.mcp_url}/tools/{tool_name}"
try:
print(f"📞 正在调用 MCP 工具: {tool_endpoint},参数: {params}")
response = requests.post(tool_endpoint, json=params, timeout=10)
response.raise_for_status() # 如果 HTTP 状态码是 4xx 或 5xx,则抛出异常
tool_response_json = response.json()
print(f"工具响应JSON: {tool_response_json}")
# 从 MCP 响应中提取文本内容
# MCP 响应通常在 content -> parts -> text
if tool_response_json.get("content"):
parts = tool_response_json["content"]
if isinstance(parts, list) and len(parts) > 0 and "text" in parts[0]:
return parts[0]["text"]
return "工具成功执行,但未找到标准文本输出。"
except requests.exceptions.RequestException as e:
error_msg = f"调用 MCP 工具 {tool_name} 失败: {e}"
print(f"❌ {error_msg}")
return error_msg
except Exception as e_json: # requests.post 成功,但响应不是期望的json或json结构不对
error_msg = f"解析 MCP 工具 {tool_name} 响应失败: {e_json}"
print(f"❌ {error_msg}")
return error_msg
def _get_openai_response(self, text_prompt, tools=None, max_iterations=5):
"""调用 OpenAI API 获取回复"""
messages = [{
"role": "user",
"content": text_prompt
}]
for i in range(max_iterations):
try:
response = openai_client.chat.completions.create(
model=OPENAI_MODEL,
messages=messages,
max_tokens=1500,
tools=tools if tools else [],
tool_choice='auto' if tools else None
)
tool_calls = response.choices[0].message.tool_calls
return {
"message": response.choices[0].message.content,
"tool_calls": tool_calls,
"usage": response.usage
}
except Exception as e:
print(f"❌ OpenAI API调用失败: {e}")
time.sleep(0.1)
if i == max_iterations - 1:
raise Exception("OpenAI API调用多次失败")
def handle_task(self, task):
message_data = task.message or {}
content = message_data.get("content", {})
user_text = content.get("text", "") # 用户原始输入
print(f"📨 (OpenAI Agent) 收到任务: '{user_text}'")
# 定义可用的工具
tools = [
{
"type": "function",
"function": {
"name": "calculator",
"description": "执行数学计算",
"parameters": {
"type": "object",
"properties": {
"expression": {
"type": "string",
"description": "要计算的数学表达式"
}
},
"required": ["expression"]
}
}
},
{
"type": "function",
"function": {
"name": "get_current_time",
"description": "获取的当前本地的时间",
"parameters": {
"type": "object",
"properties": {}
}
}
},
{
"type": "function",
"function": {
"name": "get_current_weather",
"description": "获取指定城市的天气信息(请使用英文城市名)",
"parameters": {
"type": "object",
"properties": {
"city": {
"type": "string",
"description": "要查询天气的城市名称(必须使用英文,如:Beijing, Tokyo, New York)"
}
},
"required": ["city"]
}
}
}
]
# 让OpenAI选择工具和补全参数
try:
response = self._get_openai_response(
text_prompt=user_text,
tools=tools
)
tool_calls = response.get("tool_calls")
final_response = ""
tool_result_for_openai = ""
if tool_calls:
# 执行工具调用
for tool_call in tool_calls:
function_name = tool_call.function.name
function_args = json.loads(tool_call.function.arguments) # 使用json.loads替代eval
tool_result = self._call_mcp_tool(function_name, function_args)
tool_result_for_openai += f"使用{function_name}工具,参数是{function_args},结果是:'{tool_result}'。\n"
# 让OpenAI基于工具结果生成最终回复
prompt_for_openai = f"用户问:'{user_text}'。\n我已经调用了工具,结果如下:\n{tool_result_for_openai}\n请基于这些信息,以友好和清晰的方式回答用户。"
final_response = self._get_openai_response(prompt_for_openai, tools=None).get("message")
else:
# 如果OpenAI认为不需要使用工具,直接生成回复
final_response = response.get("message")
except Exception as e:
print(f"❌ OpenAI API调用失败: {e}")
# 如果OpenAI调用失败,退回到直接对话模式
final_response = self._get_openai_response(user_text, tools=None).get("message")
task.artifacts = [{"parts": [{"type": "text", "text": final_response}]}]
task.status = TaskStatus(state=TaskState.COMPLETED)
print(f"📤 (OpenAI Agent) 回复任务: '{final_response}'")
return task
if __name__ == "__main__":
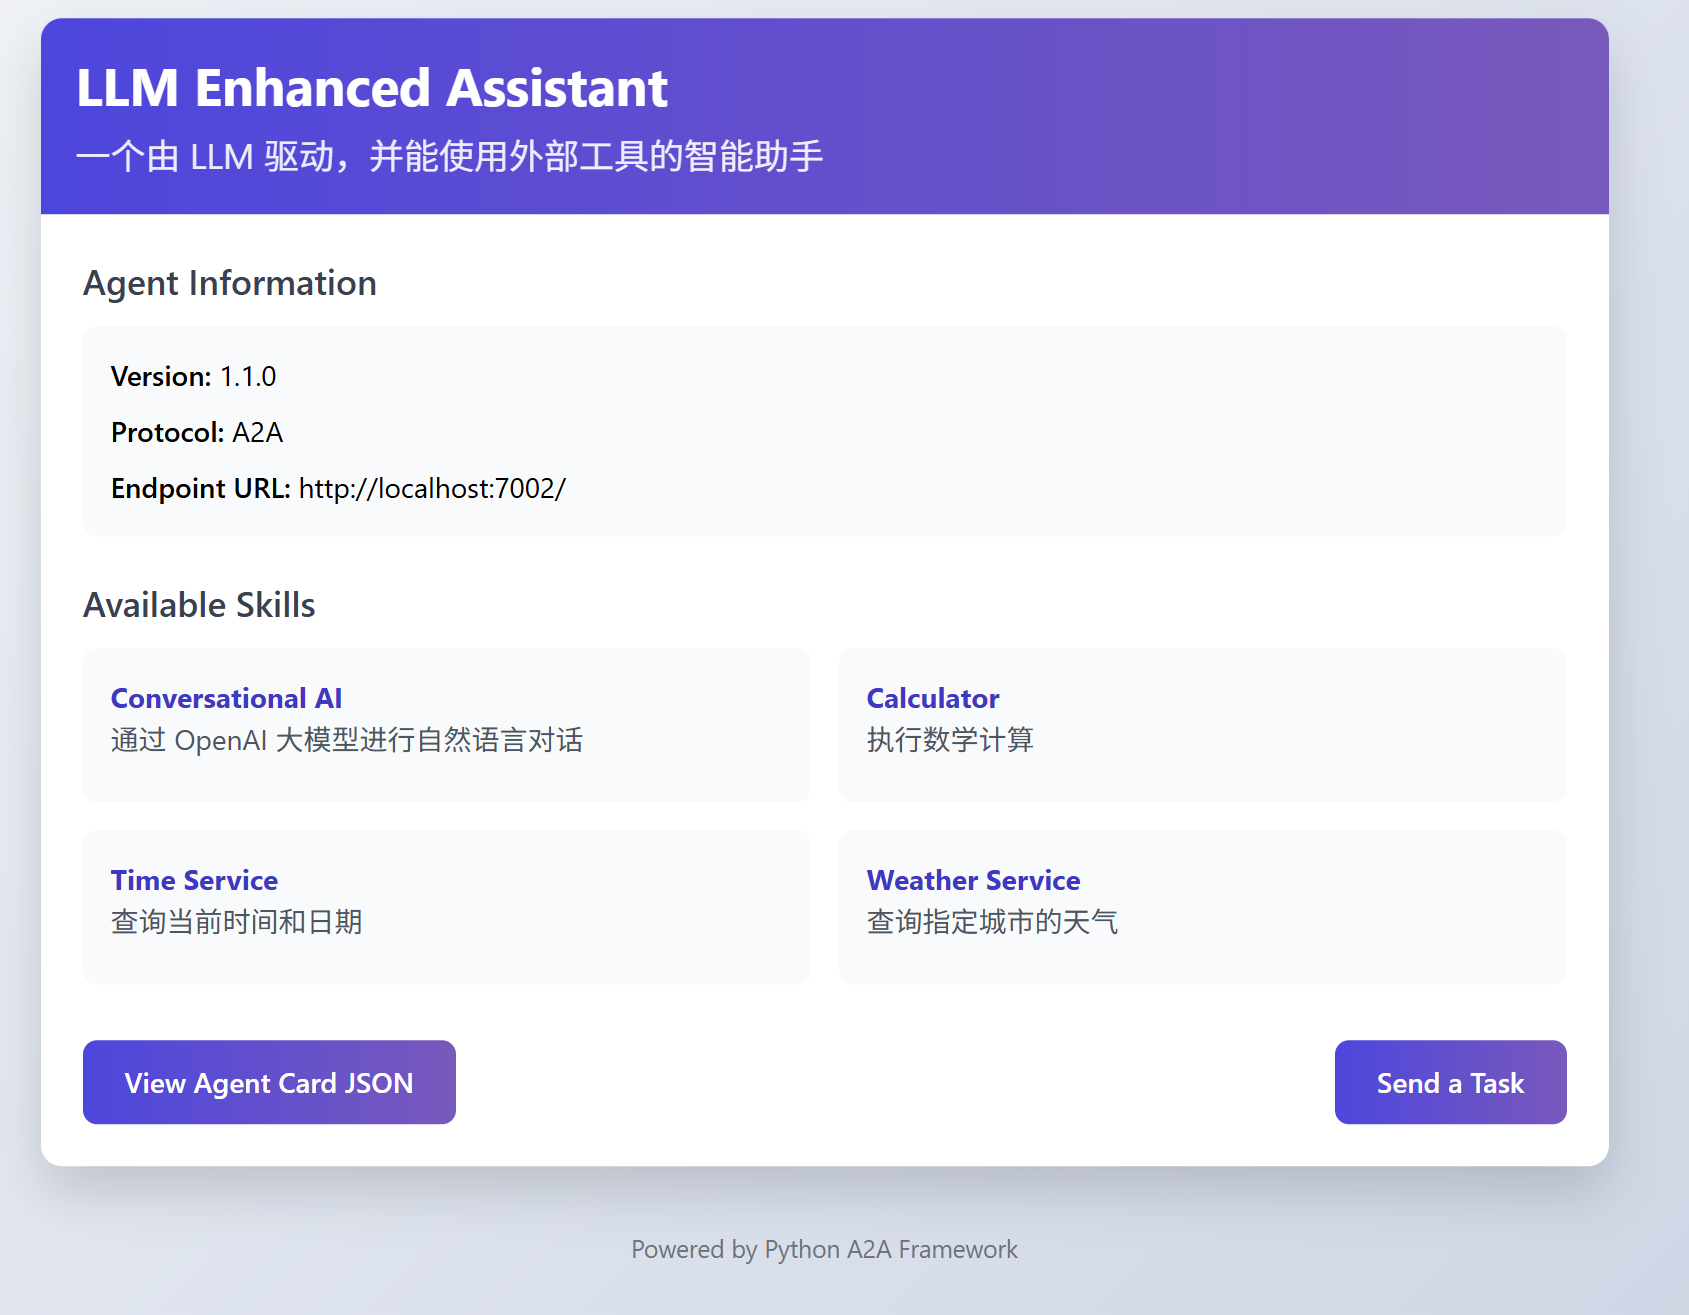
agent_card = AgentCard(
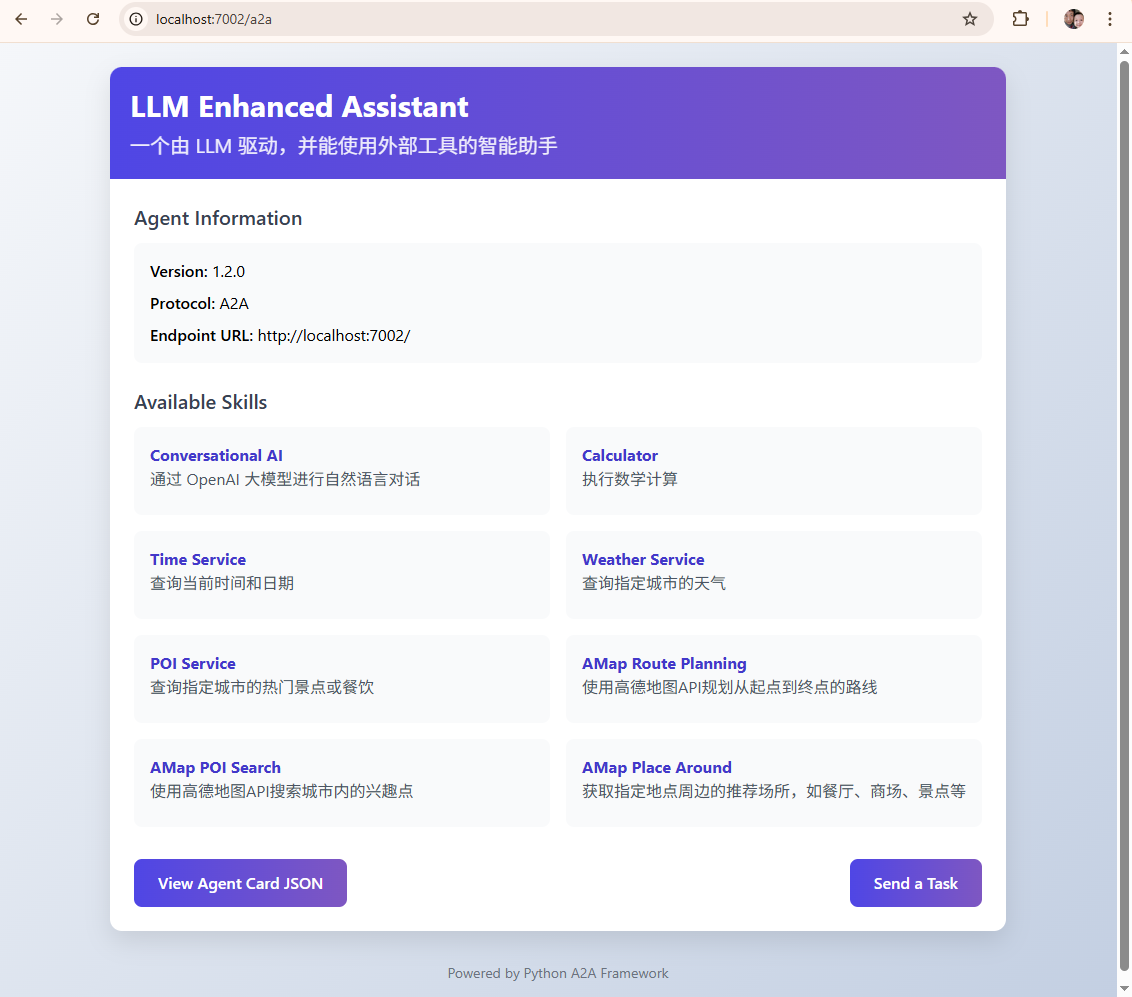
name="LLM Enhanced Assistant",
description="一个由 LLM 驱动,并能使用外部工具的智能助手",
url=f"http://localhost:{AGENT_PORT}",
version="1.1.0",
skills=[
AgentSkill(name="Conversational AI", description="通过 OpenAI 大模型进行自然语言对话"),
AgentSkill(name="Calculator", description="执行数学计算"),
AgentSkill(name="Time Service", description="查询当前时间和日期"),
AgentSkill(name="Weather Service", description="查询指定城市的天气")
]
)
openai_agent = OpenAIEnhancedAgent(agent_card, MCP_SERVER_URL)
print(f"🚀 OpenAI Enhanced A2A Agent 即将启动于 http://localhost:{AGENT_PORT}")
print(f"🔗 它将连接到 MCP 服务于 {MCP_SERVER_URL}")
print(f"🧠 它将使用 OpenAI 模型: {OPENAI_MODEL}")
# 启动服务,这会阻塞当前终端
# 建议在实际部署时,MCP 服务和 A2A Agent 服务分别在不同的进程或服务器上运行
run_server(openai_agent, host="0.0.0.0", port=AGENT_PORT)
代码稍微长了一点,但其实很好理解。核心的改进位于handle_task(…) 中,通过意图识别与工具触发,我们不再依赖固定关键字匹配,而是借助 gpt-4o 的函数调用能力,根据用户输入自动判断是否需要调用工具。gpt-4o 会解析输入内容,自主选择合适的工具(如计算器、时间查询、天气服务)并提取参数。
若触发工具调用,系统会将用户原始问题与工具返回结果拼接为增强提示(prompt_for_openai),再发送给 gpt-4o 生成最终回答。gpt-4o 会结合上下文与数据,生成自然、连贯、具备语义理解的响应(如:“北京今天多云,气温 25°C,建议带伞。”)。
测试A2A Agent(Advanced)
下面运行 A2A 代理(advanced),并进行测试。
首先确保 mcp_server.py(MCP 工具服务)仍在运行(监听在 http://localhost:7001)。
打开一个新的终端,导航到 a2a_agent_advanced.py 文件所在的目录,然后运行python a2a_agent_advanced.py。
代理启动,并监听 http://localhost:7002 端口。
 🤖 OpenAIEnhancedAgent 初始化,MCP 服务: http://localhost:7001
 🚀 OpenAI Enhanced A2A Agent 即将启动于   http://localhost:7002
 🔗 它将连接到 MCP 服务于 http://localhost:7001
 🧠 它将使用 OpenAI 模型:   gpt-4o
 Starting A2A server on http://0.0.0.0:7002/a2a
 Google A2A compatibility: Enabled
  * Serving Flask app   'python_a2a.server.http'
  * Debug mode: off
 INFO:werkzeug:WARNING: This is a development server. Do not use it in a   production deployment. Use a production WSGI server instead.
  * Running on all addresses (0.0.0.0)
  * Running on http://127.0.0.1:7002
  * Running on http://192.168.1.1:7002
 INFO:werkzeug:Press CTRL+C to quit
保持MCP端口监听。我们继续通过notebook,使用 A2AClient测试,现在我们连接到7002端口。
 from python_a2a.client import   A2AClient

 agent_url = "http://localhost:7002"
 # 创建客户端,指向你运行的代理服务地址
 client = A2AClient(agent_url)
输出如下:
INFO:werkzeug:127.0.0.1 - - [28/Jun/2025 18:09:46] "GET /.well-known/agent.json HTTP/1.1" 200 -
测试计算器功能:
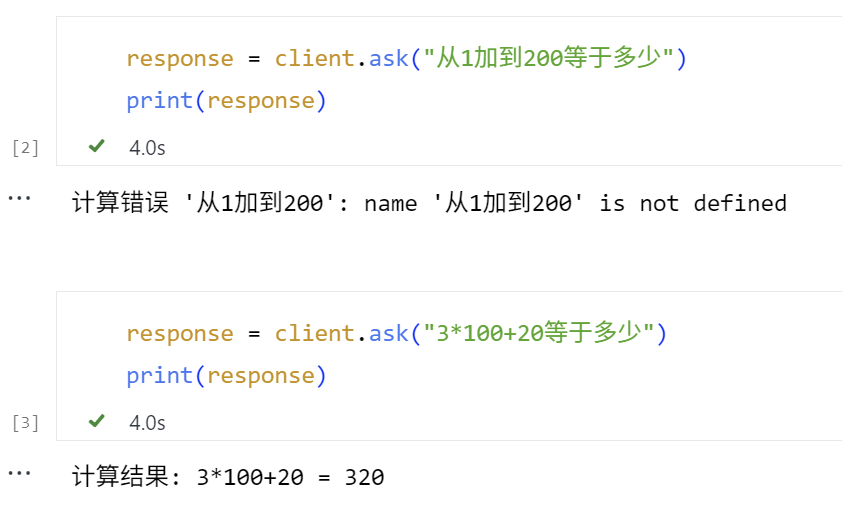
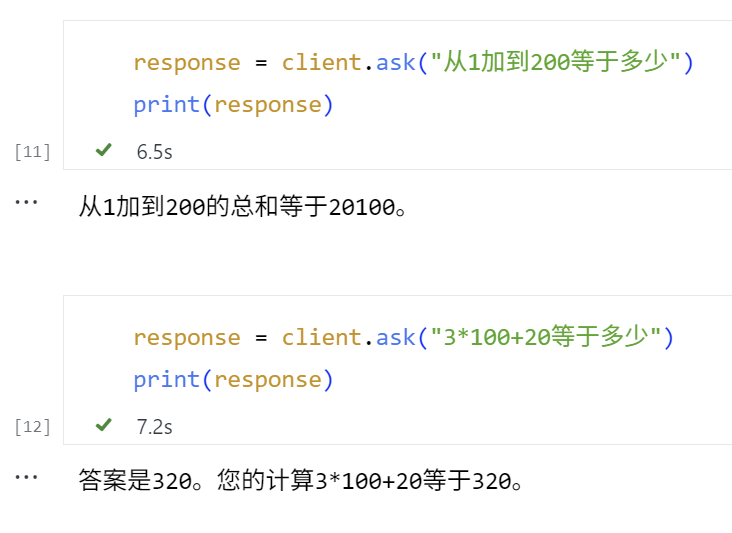
response =   client.ask("3*100+20等于多少")
print(response)
在部署 MCP 工具的终端可以看到调用了 calculator 工具的提示。
 INFO:     127.0.0.1:XXXX - "POST   /tools/calculator HTTP/1.1" 200 OK
 INFO:     127.0.0.1:YYYY - "POST /tools/calculator   HTTP/1.1" 200 OK
在部署 A2A 服务的终端看到中间的过程提示如下。
 📨 (OpenAI Agent) 收到任务: '从1加到200等于多少'
 INFO:httpx:HTTP Request: POST https://api.openai.com/v1/chat/completions   "HTTP/1.1 200 OK"
 📞 正在调用 MCP 工具:   http://localhost:7001/tools/calculator,参数:   {'expression': '200*(200+1)/2'}
 工具响应JSON: {'content': [{'type': 'text', 'text': '计算结果: 200*(200+1)/2 = 20100.0'}], 'isError': False}
 INFO:httpx:HTTP Request: POST https://api.openai.com/v1/chat/completions   "HTTP/1.1 200 OK"
 📤 (OpenAI Agent) 回复任务: '从1加到200的总和等于20100。'
 INFO:werkzeug:127.0.0.1 - - [28/Jun/2025 18:23:30] "POST /tasks/send   HTTP/1.1" 200 -
 📨 (OpenAI Agent) 收到任务: '3*100+20等于多少'
 INFO:httpx:HTTP Request: POST https://api.openai.com/v1/chat/completions   "HTTP/1.1 200 OK"
 📞 正在调用 MCP 工具:   http://localhost:7001/tools/calculator,参数:   {'expression': '3*100+20'}
 工具响应JSON: {'content': [{'type': 'text', 'text': '计算结果: 3*100+20 = 320'}], 'isError': False}
 INFO:httpx:HTTP Request: POST https://api.openai.com/v1/chat/completions   "HTTP/1.1 200 OK"
 📤 (OpenAI Agent) 回复任务: '答案是320。您的计算3*100+20等于320。'
 INFO:werkzeug:127.0.0.1 - - [28/Jun/2025 18:28:56] "POST /tasks/send   HTTP/1.1" 200 -
这里GPT大模型理解了用户意图,并且调用MCP工具,传入等差数列的计算公式来计算1到200的加和。在输出时的回复也不同于之前简单测试A2A时模板化的定义。
继续测试查询时间的功能:
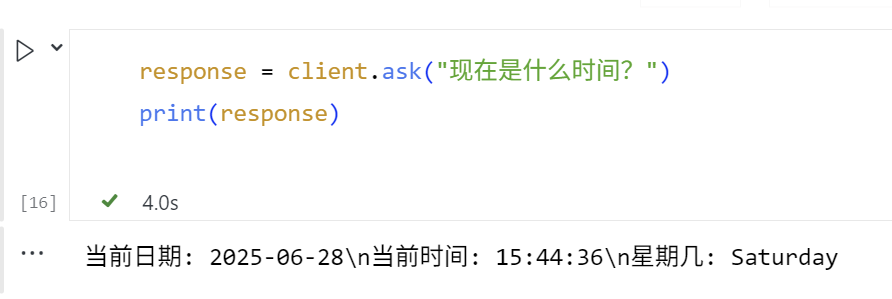
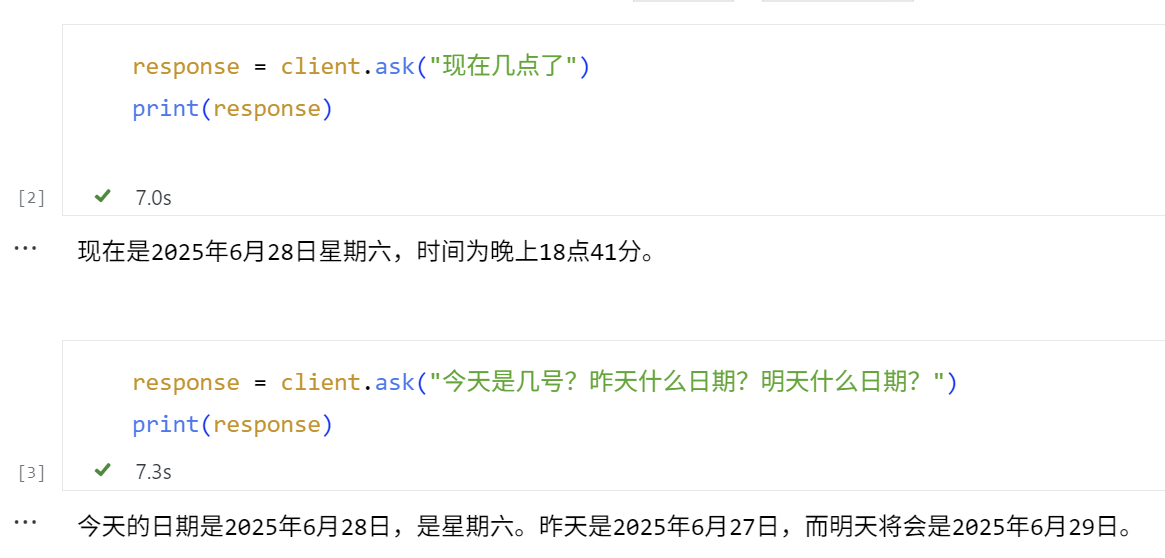
response = client.ask("现在是什么时间?")
print(response)
终端调用了定义的 get_current_time 工具并返回当前系统时间。
Bash
   📨 (OpenAI Agent) 收到任务: '现在几点了'
   INFO:httpx:HTTP Request: POST https://api.openai.com/v1/chat/completions   "HTTP/1.1 200 OK"
   📞 正在调用 MCP 工具:   http://localhost:7001/tools/get_current_time,参数: {}
   工具响应JSON: {'content': [{'type': 'text', 'text': '当前日期: 2025-06-28\\n当前时间:   18:41:50\\n星期几: Saturday'}], 'isError': False}
   INFO:httpx:HTTP Request: POST https://api.openai.com/v1/chat/completions   "HTTP/1.1 200 OK"
   📤 (OpenAI Agent) 回复任务: '现在是2025年6月28日星期六,时间为晚上18点41分。'
   INFO:werkzeug:127.0.0.1 - - [28/Jun/2025 18:41:52] "POST /tasks/send   HTTP/1.1" 200 -
   📨 (OpenAI Agent) 收到任务: '今天是几号?昨天什么日期?明天什么日期?'
   INFO:httpx:HTTP Request: POST https://api.openai.com/v1/chat/completions   "HTTP/1.1 200 OK"
   📞 正在调用 MCP 工具:   http://localhost:7001/tools/get_current_time,参数: {}
   工具响应JSON: {'content': [{'type': 'text', 'text': '当前日期: 2025-06-28\\n当前时间:   18:42:00\\n星期几: Saturday'}], 'isError': False}
   INFO:httpx:HTTP Request: POST https://api.openai.com/v1/chat/completions   "HTTP/1.1 200 OK"
   📤 (OpenAI Agent) 回复任务: '今天的日期是2025年6月28日,是星期六。昨天是2025年6月27日,而明天将会是2025年6月29日。'
   INFO:werkzeug:127.0.0.1 - - [28/Jun/2025 18:42:02] "POST /tasks/send   HTTP/1.1" 200 -
继续测试查询天气的功能。这里GPT正确地从用户输入中,识别到了需要作为参数传入的城市名称。
 # Test Case 1
 response = client.ask("帮我查东京的温度")
 print(response)

 # Test Case 2
 response = client.ask("深圳现在多少度?")
 print(response)
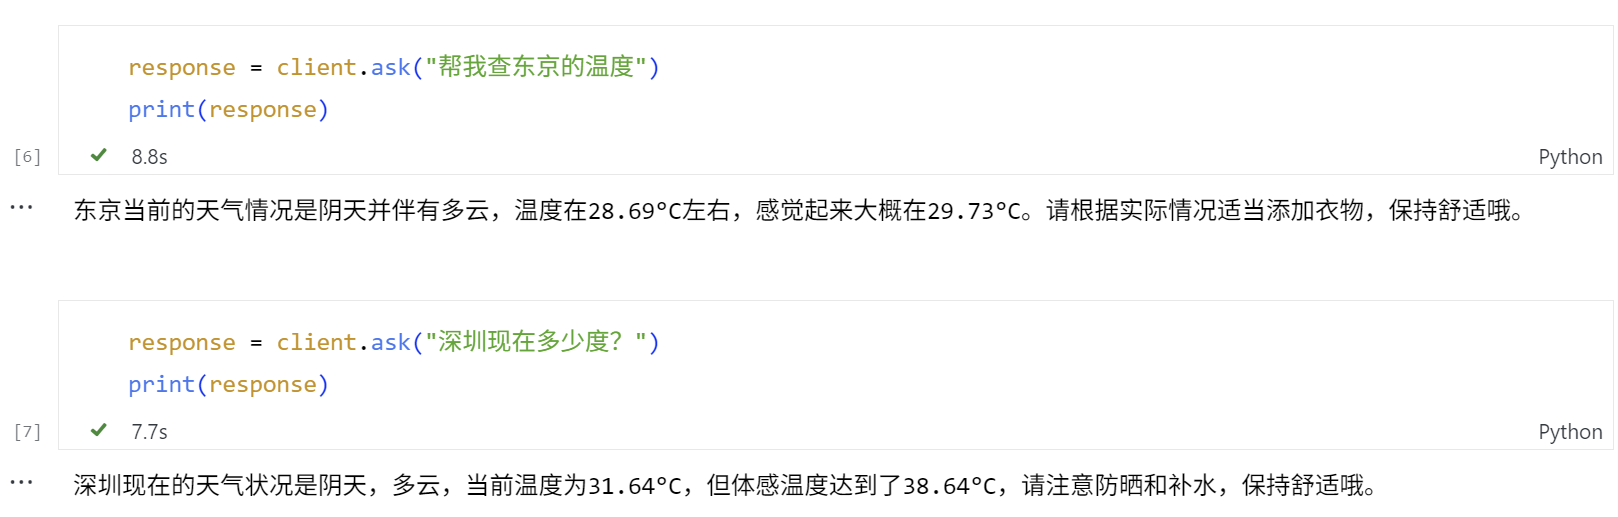
Agent调用了定义的 get_current_weather 工具,传入了正确形式的参数,并返回要查询的城市的天气。最后,它还额外给出了适当的出行建议。
📨 (OpenAI Agent) 收到任务: '帮我查东京的温度'
   INFO:httpx:HTTP Request: POST https://api.openai.com/v1/chat/completions   "HTTP/1.1 200 OK"
   📞 正在调用 MCP 工具:   http://localhost:7001/tools/get_current_weather,参数:   {'city': 'Tokyo'}
   工具响应JSON: {'content': [{'type': 'text', 'text':   'Tokyo当前天气是 阴,多云,温度为 28.69°C,体感温 度为   29.73°C'}], 'isError': False}
   INFO:httpx:HTTP Request: POST https://api.openai.com/v1/chat/completions   "HTTP/1.1 200 OK"
   📤 (OpenAI Agent) 回复任务: '东京当前的天气情况是阴天并伴有多云,温度在28.69°C左右,感觉起来大概在29.73°C。请根据实际情况适当添加衣物,保持舒适哦。'
   INFO:werkzeug:127.0.0.1 - - [28/Jun/2025 18:44:49] "POST /tasks/send   HTTP/1.1" 200 -
   📨 (OpenAI Agent) 收到任务: '深圳现在多少度?'
   INFO:httpx:HTTP Request: POST https://api.openai.com/v1/chat/completions   "HTTP/1.1 200 OK"
   📞 正在调用 MCP 工具:   http://localhost:7001/tools/get_current_weather,参数:   {'city': 'Shenzhen'}
   工具响应JSON: {'content': [{'type': 'text', 'text':   'Shenzhen当前天气是 阴,多云,温度为 31.64°C,体感温度为   38.64°C'}], 'isError': False}
   INFO:httpx:HTTP Request: POST https://api.openai.com/v1/chat/completions   "HTTP/1.1 200 OK"
   📤 (OpenAI Agent) 回复任务: '深圳现在的天气状况是阴天,多云,当前温度为31.64°C,但体感温度达到了38.64°C,请注意防晒和补水,保持舒适哦。'
   INFO:werkzeug:127.0.0.1 - - [28/Jun/2025 18:46:23] "POST /tasks/send   HTTP/1.1" 200 -
总结一下
今天又是一节实操性极强的动手实践课,我们学习并实践了:
-
A2A 与 MCP 的核心概念及协作方式:A2A 负责多智能体协作通信,MCP 提供工具调用能力,二者结合实现感知与行动闭环。
-
使用 python-a2a 开源包构建了 MCP 工具服务(如计算与时间查询)和可调用这些工具的 A2A 代理。
-
集成大语言模型,使代理具备理解意图、智能调用工具、自然生成回复的能力。
其中,A2A + MCP + LLM的组合,是构建具备执行力与协作能力智能体系统的关键。
思考题
-
把OpenAI模型改成DeepSeek等国内模型,并添加其它的实用工具。
-
添加多轮对话的上下文管理和控制机制,实现支持长对话与状态管理、流式响应与错误容错等机制。
-
这个示例中我们使用的是开源社区的python-a2a包,你能否用 A2A 和 MCP 官方包来实现类似的应用程序框架。
期待你在留言区分享你的思考或者疑问,如果这节课对你有启发,别忘了分享给身边更多朋友!
精选留言
2025-07-23 10:09:28
2025-07-21 22:58:34