你好,我是月影。
在前面的课程中,我们主要学习了文本大模型API的使用。文本大模型是最常用的基础大模型,而在我们实际的应用开发中,不仅可以使用AI生成文本,还可以绘图、创作视频、处理语音以及识别图像。
在这一节课里,我们主要来探讨一些我自己实践用过的、表现不错的图像大模型产品。
使用FLUX模型
虽然在AI绘图领域,最广为人知的是Stable Diffusion。但是,在我过去的应用实践中,比较了很多易用且经济实惠的图像生成模型,发现由Black Forest Labs团队推出的FLUX系列模型效果比较好,而且它用起来也比较简单。
在这一节,我们就来实践如何使用这一系列模型绘制图像。
首先我们在官网 https://api.us1.bfl.ai/ 注册一个账号,它支持邮箱注册,然后进入后台。
后台的功能非常简单,直接点击Add Key创建一个API KEY就可以了。
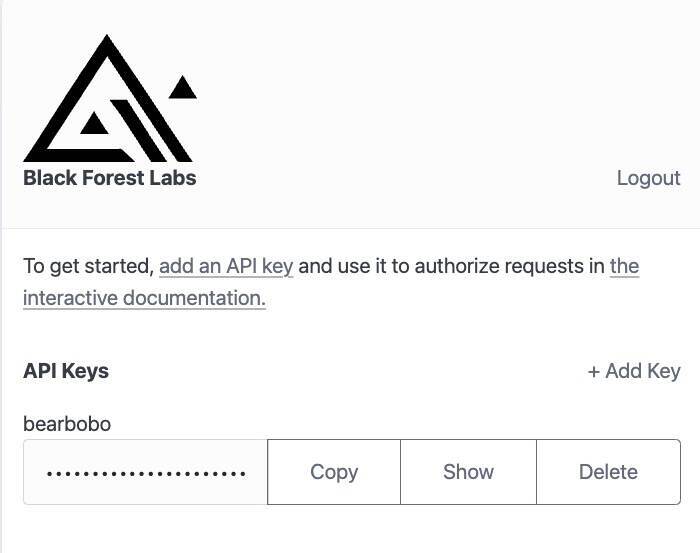
接着我们就可以用这个API KEY、选择不同版本的模型来创建图像了。
需要注意的是,图像创建成功需要消耗一定的Credits,使用不同版本模型的价格不同,具体价格可以在API文档中查看。
现在我们可以用Trae创建一个Vue项目Flux.ai Demo 1。别忘了在项目目录下添加.env.local,设置我们创建的API Key:
VITE_API_KEY=9007ab9a-****-****-****-ec0be19423ba
接着修改App.vue,代码如下:
<script setup lang="ts">
import { ref } from 'vue';

const prompt = ref('A lovely rabbit');
const imgUrl = ref('');
const progress = ref('0%');

const generateImage = async () => {
 const endpoint = `https://api.bfl.ml/v1`;
 const modelName = 'flux-dev';
 const payload = {
  prompt: prompt.value,
  width: 1024,
  height: 1024,
  steps: 40,
  prompt_upsampling: true,
  seed: 42,
  guidance: 3,
  sampler: 'dpmpp_2m',
  safety_tolerance: 2,
 };

 const headers = {
    'Content-Type': 'application/json',
    'x-key': import.meta.env.VITE_API_KEY,
  };

  const res = await fetch(`${endpoint}/${modelName}`, {
    headers,
    method: 'POST',
    body: JSON.stringify(payload),
  });
  const id = (await res.json()).id;
  const resultUrl = `${endpoint}/get_result?id=${id}`;
  imgUrl.value = 'https://res.bearbobo.com/resource/upload/a3IZyOsZ/loading-giaz5ycpd7j.gif';
  do {
    await new Promise((resolve) => setTimeout(resolve, 100));
    const result = await fetch(resultUrl);
    const resultJson = await result.json();
    if (resultJson.status === 'Pending') {
      const progressValue = resultJson.progress;
      if(progressValue) {
        progress.value = `${Math.round(progressValue * 100)}%`;
      }
      continue;
    }
    const sample = resultJson.result?.sample;
    if (sample) {
      imgUrl.value = sample;
    } else {
      imgUrl.value = 'https://res.bearbobo.com/resource/upload/vNg4ALJv/6659895-ox36cbkajrr.png';
    }
    break;
  } while (1);
};
</script>

<template>
  <div class="container">
    <div>
      <label>Prompt </label>
      <button @click="generateImage">Generate</button>
      <textarea class="input" type="text" v-model="prompt" />
    </div>
    <div class="progress">
      <div :style="{width: progress}"></div>
    </div>
    <div class="output">
      <img :src="imgUrl" />
    </div>
  </div>
</template>

<style scoped>
.input {
  width: 100%;
  height: 2rem;
  font-size: 1rem;
  padding: 0.5rem;
  border: 1px solid #ccc;
  border-radius: 0.5rem;
}
.progress {
  width: 100%;
  height: 0.1rem;
  margin: .4rem 0;
  background: #ccc;
}
.progress > div {
  background: #c00;
  height: 100%;
}
.container {
  display: flex;
  flex-direction: column;
  align-items: start;
  justify-content: start;
  height: 100vh;
}
.output {
  display: flex;
  flex-direction: column;
  align-items: center;
  justify-content: center;
  min-height: 200px;
  border: 1px solid #ccc;
}
.output > img {
  width: 100%;
}
</style>
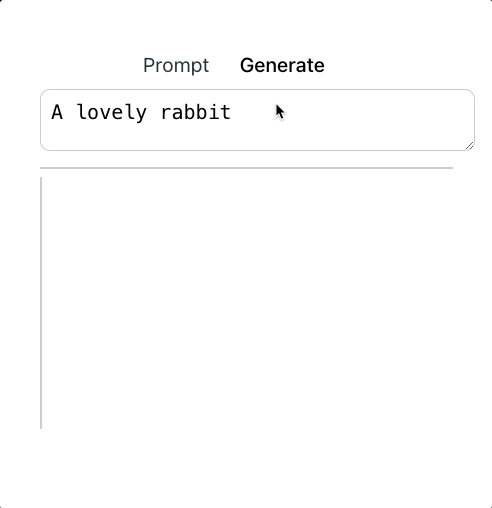
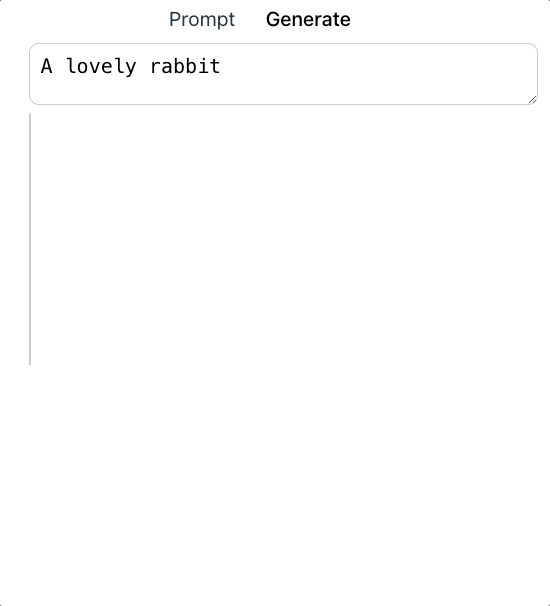
这样我们就创建好了一个简单的文生图的AI应用。
你可以输入和修改提示词,给出你想要的AI生成的任何风格图片,点击生成按钮,等待图片生成结果就可以了。
接下来,我们来简单过一下核心代码。其实最主要的逻辑就是generateImage这个函数,在这里我们设置调用api的地址 https://api.bfl.ml/v1,模型名称flux-dev,以及需要请求的payload数据。
 const endpoint = `https://api.bfl.ml/v1`;
 const modelName = 'flux-dev';

 const payload = {
  prompt: prompt.value,
  width: 1024,
  height: 1024,
  steps: 40,
  prompt_upsampling: true,
  seed: 42,
  guidance: 3,
  sampler: 'dpmpp_2m',
  safety_tolerance: 2,
 };
这里设置了一些常用的参数,含义如下:
-
prompt: 即图片文本描述提示词。
-
width: 图像宽度,单位为像素值。
-
height: 图像高度,单位为像素值。
-
steps: 表示模型生成图像时“去噪”或“细化”图像的迭代步骤数,通常步数越多,图像质量越高,但计算时间也会相应更长。
-
prompt_upsampling:决定是否对输入文本描述进行上采样,以提高分辨率,从而可能获得更加精细的图像。
-
seed:随机种子,用于确保每次生成图像时有一定的随机性。如果你使用相同的种子并且其他参数相同,模型生成的图像会是相同的。通过更改种子,你可以生成不同的图像。
-
guidance:用于控制模型在生成图像时遵循文本描述的严格程度。较高的指导系数会使得图像更符合输入的文本描述,较低的系数则可能让图像结果更多样,允许模型在一定程度上发挥更多的创意。
-
sampler:采样器,决定模型生成图像时使用的算法。dpmpp_2m是其中一种扩散模型采样器。不同的采样器具有不同的效果和表现,选择不同的采样器会影响图像生成的质量、风格和效率。
-
safety_tolerance:控制生成内容安全性容忍度,较低的安全容忍度可能会阻止模型生成带有暴力、色情或不适宜内容的图像。
除了这些参数外,还有其他一些参数,在这里就不一一列举了,有兴趣的同学可以自行查看Black Forest Labs的官方文档进行进一步研究。
再接下来是请求头:
const headers = {
  'Content-Type': 'application/json',
  'x-key': import.meta.env.VITE_API_KEY,
};
我们看到Flux.ai和前面我们体验过的文本大模型类似,是通过将API Key在请求头中发送给服务器来鉴权,不同点在于前面是设置HTTP协议标准的Authorization字段,而这里是设置x-key扩展字段。
接下来就要发起请求,由于绘图过程是一个耗时比较长的过程,因此Flux.ai将生成图片请求设计为读写分离的异步操作,即分为两个接口,一个接口发起绘图操作,另一个接口查询绘图状态。
所以我们首先发起绘图操作:
const res = await fetch(`${endpoint}/${modelName}`, {
  headers,
  method: 'POST',
  body: JSON.stringify(payload),
});
该操作成功执行后,服务器会立即返回一个图片生成任务的唯一ID,后续可以通过查询状态接口,根据这个ID来查询绘图状态。
const id = (await res.json()).id;
const resultUrl = `${endpoint}/get_result?id=${id}`;
imgUrl.value = 'https://res.bearbobo.com/resource/upload/a3IZyOsZ/loading-giaz5ycpd7j.gif';
do {
  await new Promise((resolve) => setTimeout(resolve, 100));
  const result = await fetch(resultUrl);
  const resultJson = await result.json();
  if (resultJson.status === 'Pending') {
    const progressValue = resultJson.progress;
    if(progressValue) {
      progress.value = `${Math.round(progressValue * 100)}%`;
    }
    continue;
  }
  const sample = resultJson.result?.sample;
  if (sample) {
    imgUrl.value = sample;
  } else {
    imgUrl.value = 'https://res.bearbobo.com/resource/upload/vNg4ALJv/6659895-ox36cbkajrr.png';
  }
  break;
} while (1);
上面的代码片段里,我们拿到任务ID后,通过轮询的方式来查询图片生成的状态。因为generateImage是个异步函数,所以我们可以直接用异步while循环的形式来写,这样更容易理解。
在每一轮查询过程中,我们先等待100毫秒,然后查询状态,此时如果状态是Pending,表示生成图片的任务还在执行中,此时返回结果的progress字段返回任务的进度.在这里我们在UI细节上用div绘制了一个简单的进度条,此时更新进度条的进度值就可以。
当状态不为Pending的时候,我们尝试读取result.sample,这个字段内得到的就是生成图片的临时URL。在真正的业务里,我们应当将图片保存到自己的服务器或者CDN地址中,但是在这里,作为演示,我们可以直接将图片在前端展示出来。
这样我们就实现了使用Flux.ai生成图片的一个比较完整的小应用。
使用可灵AI
除了Flux外,在国内也有一些不错的图像大模型,比如智谱清言的CogView模型,以及快手的可灵AI,这些模型在我的AI应用产品中也会被使用。
现在我们就来通过实战了解一下可灵AI的使用方法。
首先,在https://klingai.kuaishou.com/注册可灵AI,登录后,点击左下角“开发者平台”链接,可以进入控制台。
点击控制台左侧菜单项“密钥管理”,我们可以创建密钥。
可灵AI的密钥由一对字符串构成,分别是AccessKey ID和AccessKey Secret,我们需要使用它们来完成鉴权。
可灵AI的鉴权机制相对来说比较复杂一些,安全性也更高。它采用Json Web Token加密的方式,通过AccessKey ID和AccessKey Secret生成Token,然后再利用Token进行鉴权。
因此要使用可灵AI的话,我们需要自己实现生成Token的API,具体的我们还是通过实践来学习。
首先还是用Trae创建一个Vue项目,同样先配置.env.local
ACCESS_KEY_ID=8f617**********fcf9
ACCESS_KEY_SECRET=36092**********94c5
接着在终端安装node.js依赖包:
pnpm i dotenv express jsonwebtoken
添加server.js文件,内容如下:
import * as dotenv from 'dotenv'
import express from 'express';
import jwt from 'jsonwebtoken';

dotenv.config({
  path: ['.env.local', '.env']
});

const accessKeyId = process.env.ACCESS_KEY_ID;
const accessKeySecret = process.env.ACCESS_KEY_SECRET;

const app = express();
const port = 3000;

async function authKlingai() {
    const headers = {
        algorithm: 'HS256',
    };
    const now = Math.floor(Date.now() / 1000);
    const payload = {
        iss: accessKeyId,
        exp: now + 1800, // 有效时间,此处示例代表当前时间+1800s(30min)
        nbf: now - 5, // 开始生效的时间,此处示例代表当前时间-5秒
    };

    const token = jwt.sign(payload, accessKeySecret, headers);
    return token;
}

app.get('/jwt-auth', async (req, res) => {
    const token = await authKlingai();
    res.send(token);
});

app.listen(port, () => {
    console.log(`Server is running on port ${port}`);
});
上面的代码,我们主要是通过jsonwebtoken加密来获得鉴权token。
我们在vite.config.ts中添加server配置项:
  server: {
    allowedHosts: true,
    port: 4399,
    proxy: {
      '/api': {
        target: 'http://localhost:3000',
        secure: false,
        rewrite: path => path.replace(/^\/api/, ''),
      },
      '/klingai': {
        target: 'https://api.klingai.com',
        changeOrigin: true,
        rewrite: path => path.replace(/^\/klingai/, ''),
      }
    },
  }
这样前端就可以通过 /api/jwt-token 接口获得token了。另外由于可灵AI不支持前端跨域请求,所以我们在这里针对https://api.klingai.com也做了一个请求转发。
接下来还是改写App.vue:
<script setup lang="ts">
import { ref } from 'vue';

const prompt = ref('A lovely rabbit');
const imgUrl = ref('');

const generateImage = async () => {
  const negativeWords = 'Blurry, Bad, Bad anatomy, Bad proportions, Deformed, Disconnected limbs, Disfigured, Extra arms, Extra limbs, Extra hands, Fused fingers, Gross proportions, Long neck, Malformed limbs, Mutated, Mutated hands, Mutated limbs, Missing arms, Missing fingers, Poorly drawn hands, Poorly drawn face.';

  const endpoint = `/klingai/v1/images/generations`;

  const token = await (await fetch('/api/jwt-auth')).text();

  const payload = {
    prompt: prompt.value,
    negative_prompt: negativeWords,
    aspect_ratio: '1:1',
  };

  const headers = {
    'Content-Type': 'application/json',
    'Authorization': `Bearer ${token}`,
  };

  const res = await fetch(endpoint, {
    headers,
    method: 'POST',
    body: JSON.stringify(payload),
  });

  if (res.status >= 400) {
    throw new Error(`Non-200 response: ${await res.text()}`);
  }

  const ret: any = await res.json();
  const id = ret.data.task_id;
  const resultUrl = `${endpoint}/${id}`;
  imgUrl.value = 'https://res.bearbobo.com/resource/upload/a3IZyOsZ/loading-giaz5ycpd7j.gif';
  do {
    await new Promise((resolve) => setTimeout(resolve, 100));
    const result = await fetch(resultUrl, {
      headers,
    });
    const resultJson = await result.json();
    const taskStatus = resultJson.data.task_status;
    if (taskStatus === 'processing' || taskStatus === 'submitted') {
      continue;
    }
    if (taskStatus === 'failed') {
      throw new Error(`Task failed: ${JSON.stringify(resultJson)}`);
    }
    const sample = resultJson.data?.task_result;
    if (sample) {
      imgUrl.value = sample.images[0].url;
    } else {
      imgUrl.value = 'https://res.bearbobo.com/resource/upload/vNg4ALJv/6659895-ox36cbkajrr.png';
    }
    break;
  } while (1);
};
</script>

<template>
  <div class="container">
    <div>
      <label>Prompt </label>
      <button @click="generateImage">Generate</button>
      <textarea class="input" type="text" v-model="prompt" />
    </div>
    <div class="output">
      <img :src="imgUrl" />
    </div>
  </div>
</template>

<style scoped>
.input {
  width: 100%;
  height: 2rem;
  font-size: 1rem;
  padding: 0.5rem;
  border: 1px solid #ccc;
  border-radius: 0.5rem;
}
.progress {
  width: 100%;
  height: 0.1rem;
  margin: .4rem 0;
  background: #ccc;
}
.progress > div {
  background: #c00;
  height: 100%;
}
.container {
  display: flex;
  flex-direction: column;
  align-items: start;
  justify-content: start;
  height: 100vh;
}
.output {
  display: flex;
  flex-direction: column;
  align-items: center;
  justify-content: center;
  min-height: 200px;
  border: 1px solid #ccc;
}
.output > img {
  width: 100%;
  max-width: 600px;
}
</style>
这样我们就可以使用可灵AI生成我们想要的图片了。
我们看一下前端代码。其实和调用FLUX类似,只不过我们需要先从node.js服务获取token:
const token = await (await fetch('/api/jwt-auth')).text();
然后使用token进行请求图片生成。可灵AI也是异步读写分离,先请求图片生成接口,获取task_id,然后再通过task_id进行轮询直到生成完毕。有一个细节的区别是,可灵AI的轮询状态接口只能查询到状态,没有生成的进度条,所以我去掉了显示进度条的前端逻辑。
由于整体代码和前面FLUX API的逻辑区别不大,我在这里就不赘述了。如果你还有疑问,可以通过运行和修改代码进一步深入研究。
要点总结
这一节课,我们学习了两个图像生成模型的API调用方法。在鉴权方面,FLUX采用简单的API Key鉴权机制,这和我们前面介绍的文本大模型鉴权机制类似。而可灵AI则采用了Json Web Token的方式进行鉴权,鉴权过程稍微复杂一些,但是安全性更高。
无论是FLUX还是可灵AI,它们在图像生成中都采用了读写操作分离的异步设计,这样我们在生成过程中通过接口查询状态,可以更灵活地实现前端的交互,这种设计方法,也是值得我们学习和借鉴的。实际上在我自己的业务中,也采用类似的设计来改进用户体验。
课后练习
FLUX模型支持不同的采样器(sampler),通过配置这些采样器改变生成算法,可以获得不同的生成效果。你可以研究FLUX官方文档,尝试自己修改sampler参数,试试看它会得到怎样的效果,将你的结论分享到评论区吧。
精选留言
2025-04-29 19:48:50
2025-04-14 17:33:07
server: {
proxy: {
'/api': {
target: 'https://api.bfl.ml',
changeOrigin: true,
rewrite: (path) => path.replace(/^\/api/, '')
}
}
}
2025-07-24 13:49:36
Error: reCAPTCHA not loaded. Please try again later.
2025-07-01 23:54:57
2025-05-15 07:50:17
res
2025-05-07 11:29:43
2025-04-15 10:34:27
2025-04-13 15:50:33